Editor-List
Description
Inserts an Editor for editing a value using a List control. IMPORTANT: This control MUST be inserted inside an Editor-Set control. NOTE: The properties of the List used in the editor can be configured by a genie in the FormView builder.
It is possible to create an 'Editor-List' control that will filter the data it displays based on what is selected in a second list control. For an example on how to do this see this page on Built-in List Control Editors in a Form View.
Create a Simple Editor-List Using Static Data.
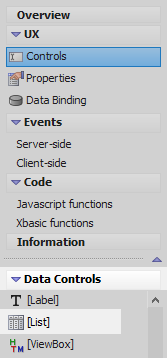
In the UX Builder on the Controls page open the 'Data Controls' menu. Click on the [List] option to add a list control to the component.
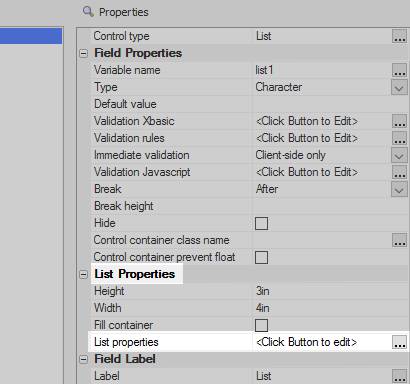
Highlight the list control. In the properties list click on the 'List properties' property under the List Properties section. The List Builder will open.
On the List Builder's 'Data Source' pane set the Data Source Type to 'Static'.
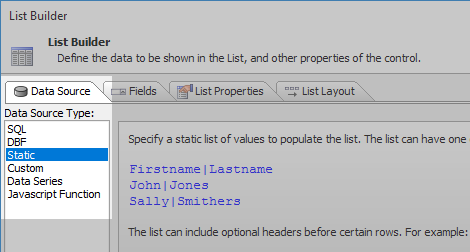
Click the [...] button next to the 'Static data' property in the Data Source properties list's 'Static Data' section.
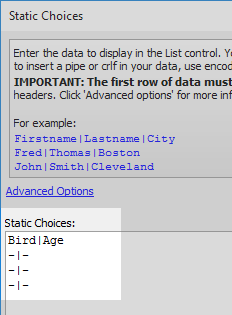
Define the following Static Choices and click OK.
Bird|Age
-|-
-|-
-|-
Open the List Layout pane. In the 'Available Fields' list highlight the two static data fields you defined. Use the blue > arrow to move the fields to the 'Columns in List'.

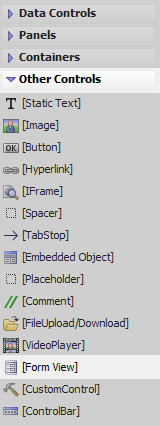
Highlight the list control. Open the 'Other Controls' menu and click on the [Form View] option to add a Form View control to the component.
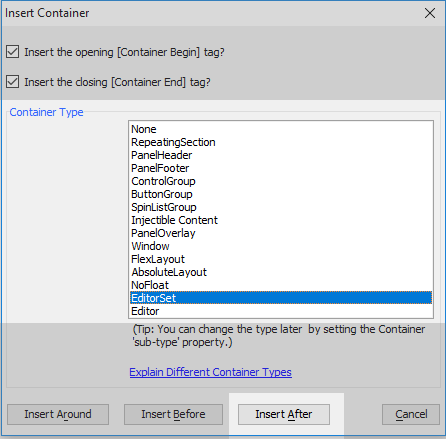
Highlight the form view control. Open the 'Container' menu and click on [Container].
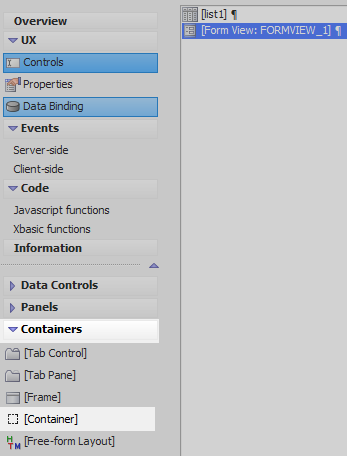
From the 'Container Type' list select the 'EditorSet' option and click 'Insert After'.
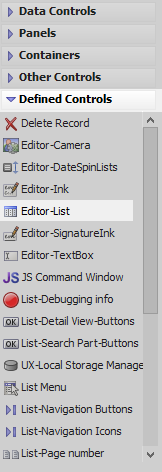
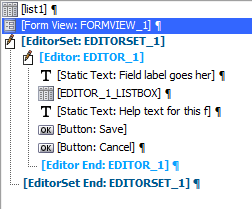
Highlight the editor-set in the control tree. Open the 'Defined Controls' and click on the 'Editor-List' option. Leave the default name for the editor as it is and click OK.
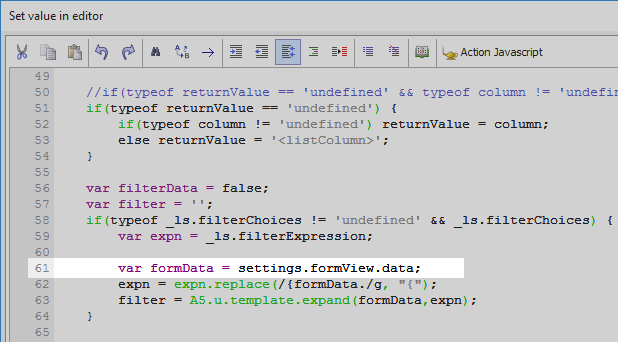
Highlight the editor's [Editor:EDITOR_1] tag. In the 'Editor Properties' section click the [...] button next to the 'Set value in editor' property.

Scroll down the code to the 'var formData' definition (near line 60). If it looks like this "var formData = settings['data'];" then change this to the following:
var formData = settings.formView.data;
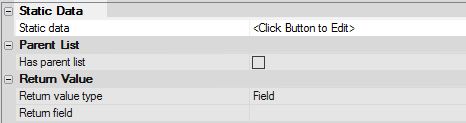
Highlight the Form View control.
In the Form View control's properties list click on the 'Form properties' property to open the Form View Builder.
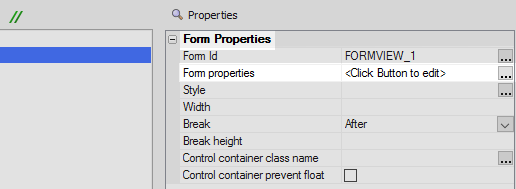
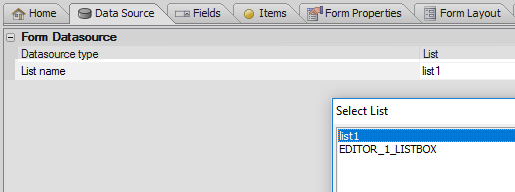
In the 'Data Source' pane of the Form View Builder set the 'Datasource type' to 'List'

Click the [...] button next to the 'List name' property. Select the list control, 'list1'.
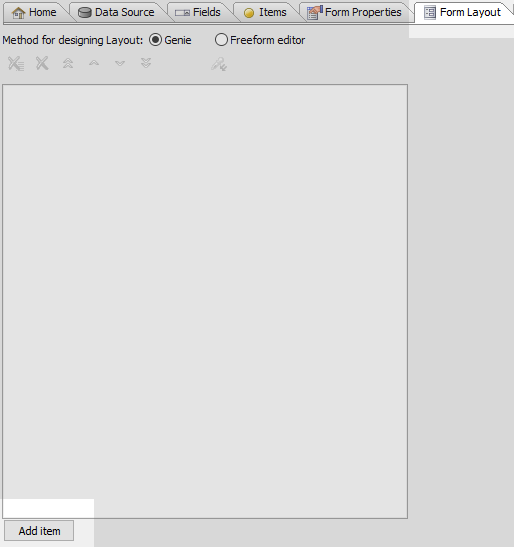
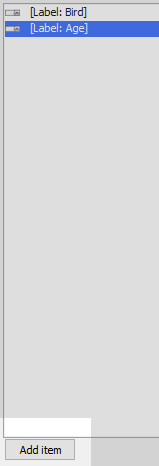
Open the 'Form Layout' pane and click the 'Add item' button.
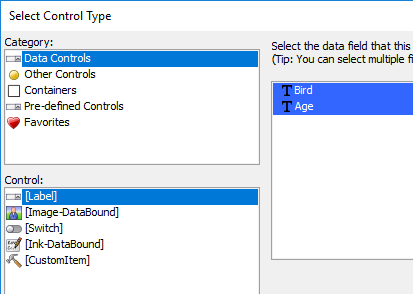
In the 'Category' list select the 'Data Controls' option. In the 'Control' list select the [Label] option. Highlight the list of fields on the right and click OK.
Click the 'Add item' button.
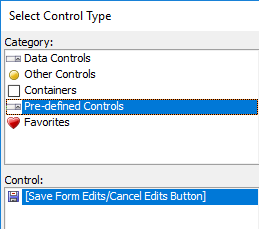
Select the 'Pre-defined Controls' option in the Category menu and the [Save Form Edits/Cancel Edits Button] option in the 'Controls' menu.
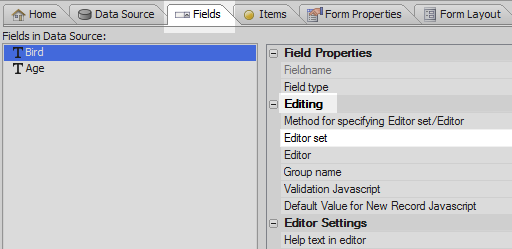
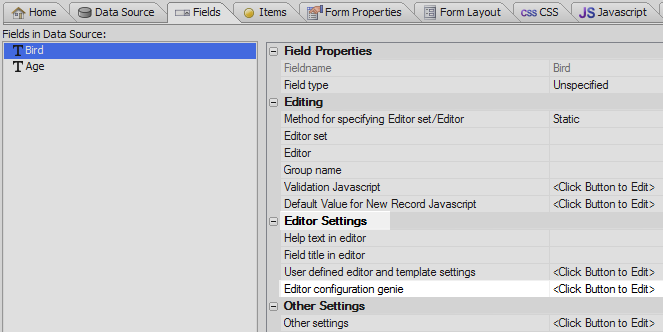
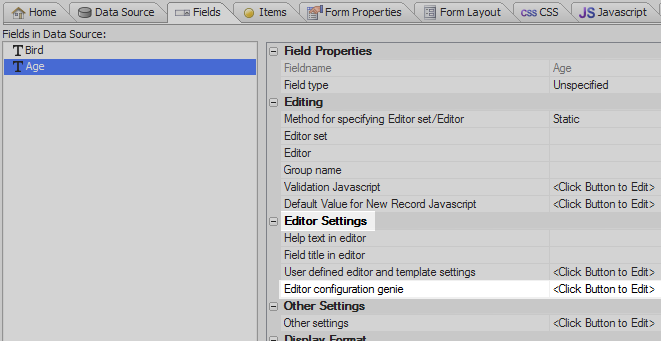
Open the 'Fields' pane. Highlight the first field in the 'Fields in Data Source' pane. Click the [...] button next to the 'Editor set' property in the 'Editing' section of the properties list on the right.
In the Select Editor's 'Editor Set' list select 'EDITORSET_1'. In the 'Editor' list select 'EDITOR_1', the editor-list you defined. Click the 'Assign selection to multiple fields' column.
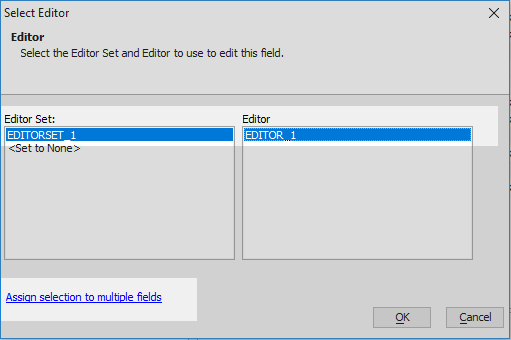
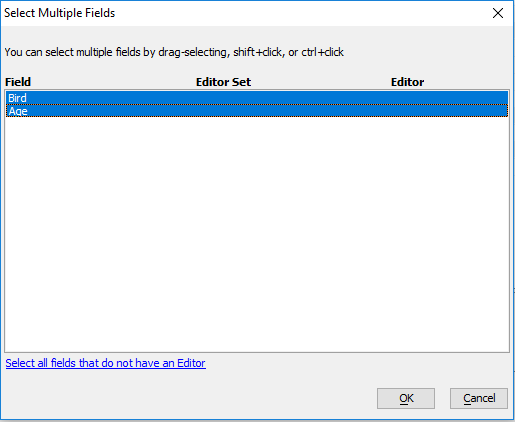
Highlight all of the fields and click OK and OK again.
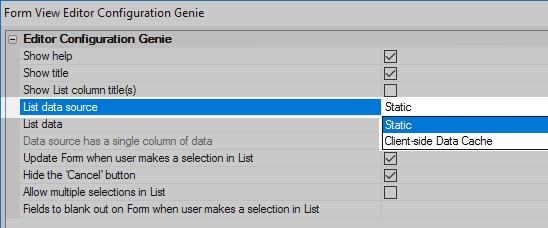
Highlight the first field in the 'Fields in Data Source' list. Click the [...] button next to the 'Editor configuration genie' property in the 'Editor Settings' section of the properties list.
In the genie set the 'List data source' property to 'Static'
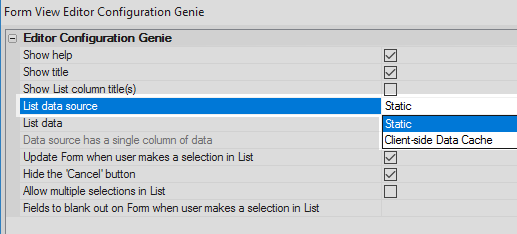
Click the [...] button next to the 'List data' property.
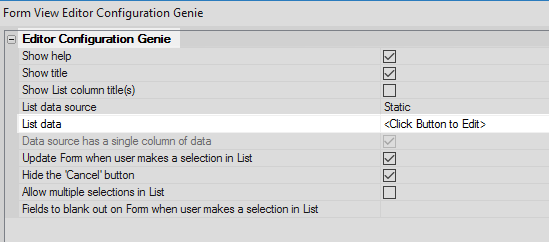
Add the following JSON data and click OK. Click OK again to close the Form View Editor Configuration Genie.
[
    {"Bird" : "Bluejay"},
    {"Bird" : "Chickadee"},
    {"Bird" : "Kingfisher"},
    {"Bird" : "Great Horned Owl"}

]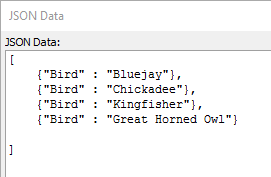
Highlight the second field in the 'Fields in Data Source' list. Click the [...] button next to the 'Editor configuration genie' property for this field.
In the genie set the 'List data source' property to 'Static'.
Click the [...] button next to the 'List Data' property and add the following JSON:
[
    {"Age" : "1"},
    {"Age" : "2"},
    {"Age" : "3"},
    {"Age" : "4"}
]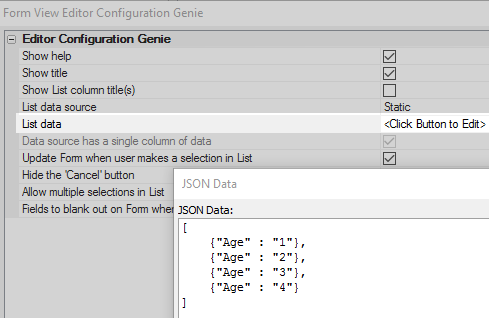
Click OK to close the Form View Editor Configuration Genie and OK again to close the Form View Builder. Run the component in Live Preview.
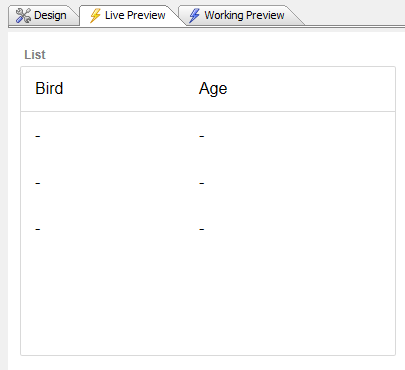
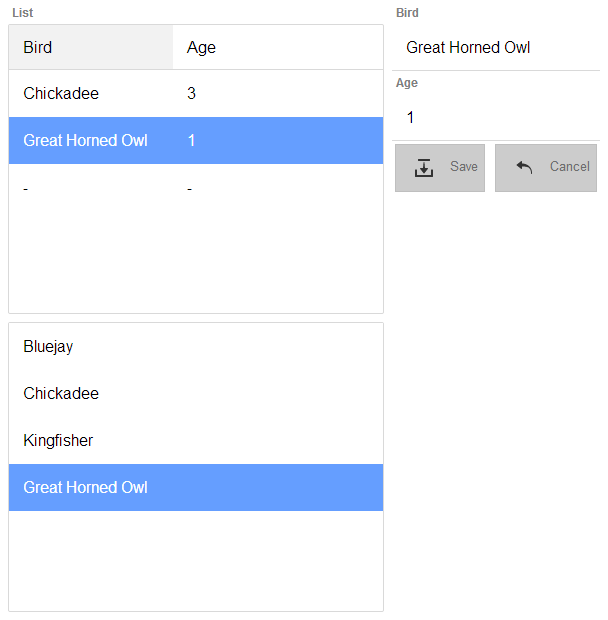
Click on one of the undefined rows in the list control. The form view control should open displaying the fields for that row.
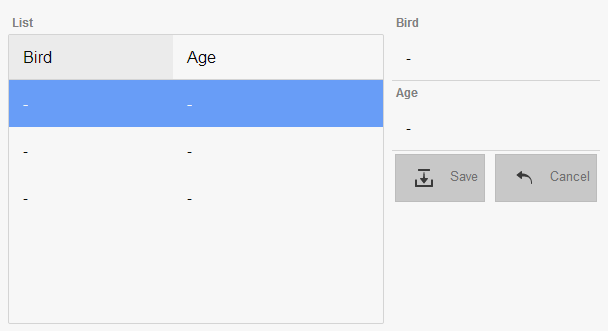
Click on a Form View item, the editor list will appear. Make a selection from the Editor-list and the definition should be added to the Form View.
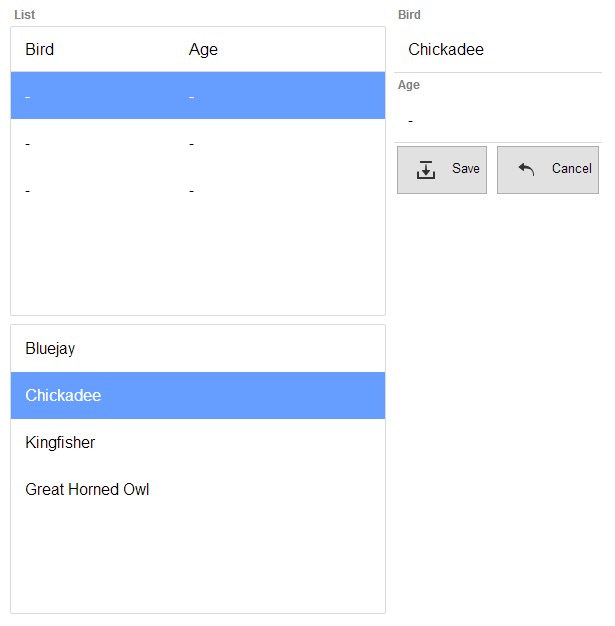
Click the Save button under the Form View to add the new definition to the List control.
